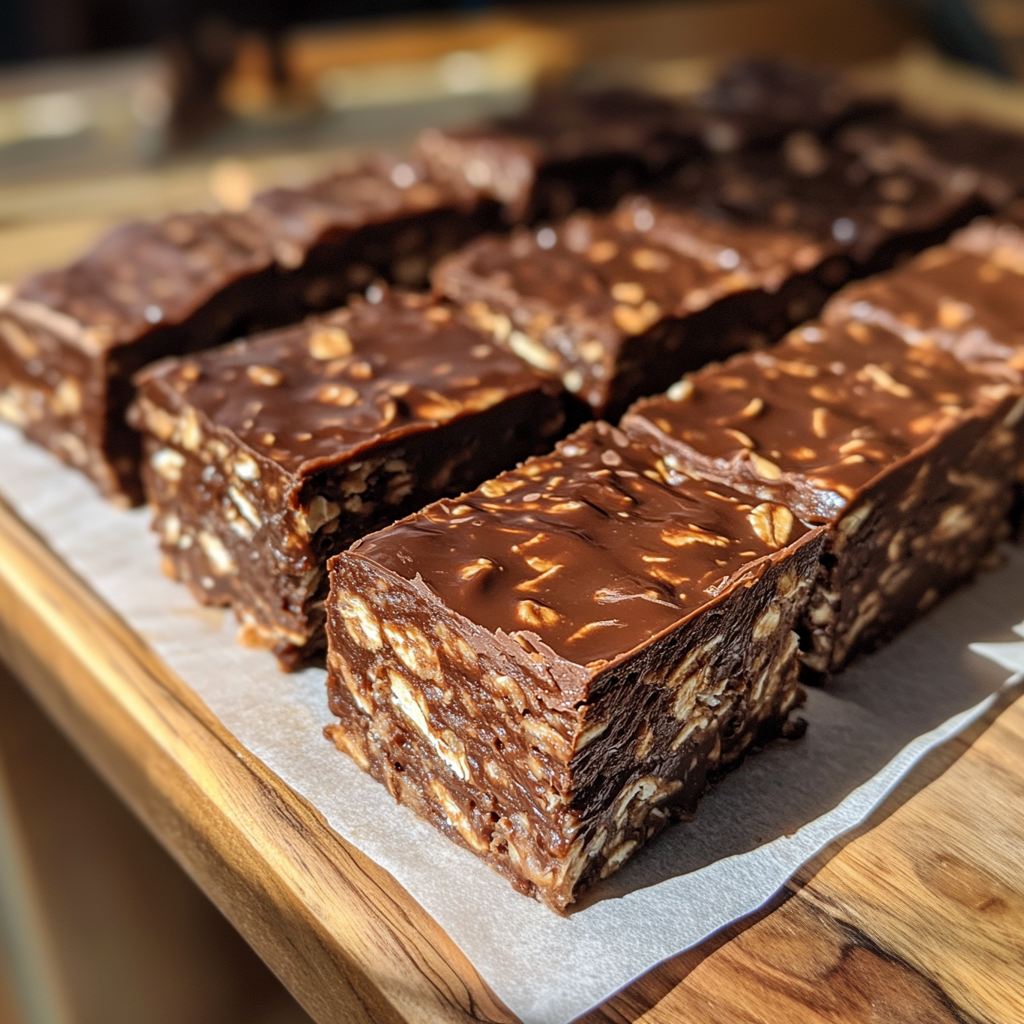
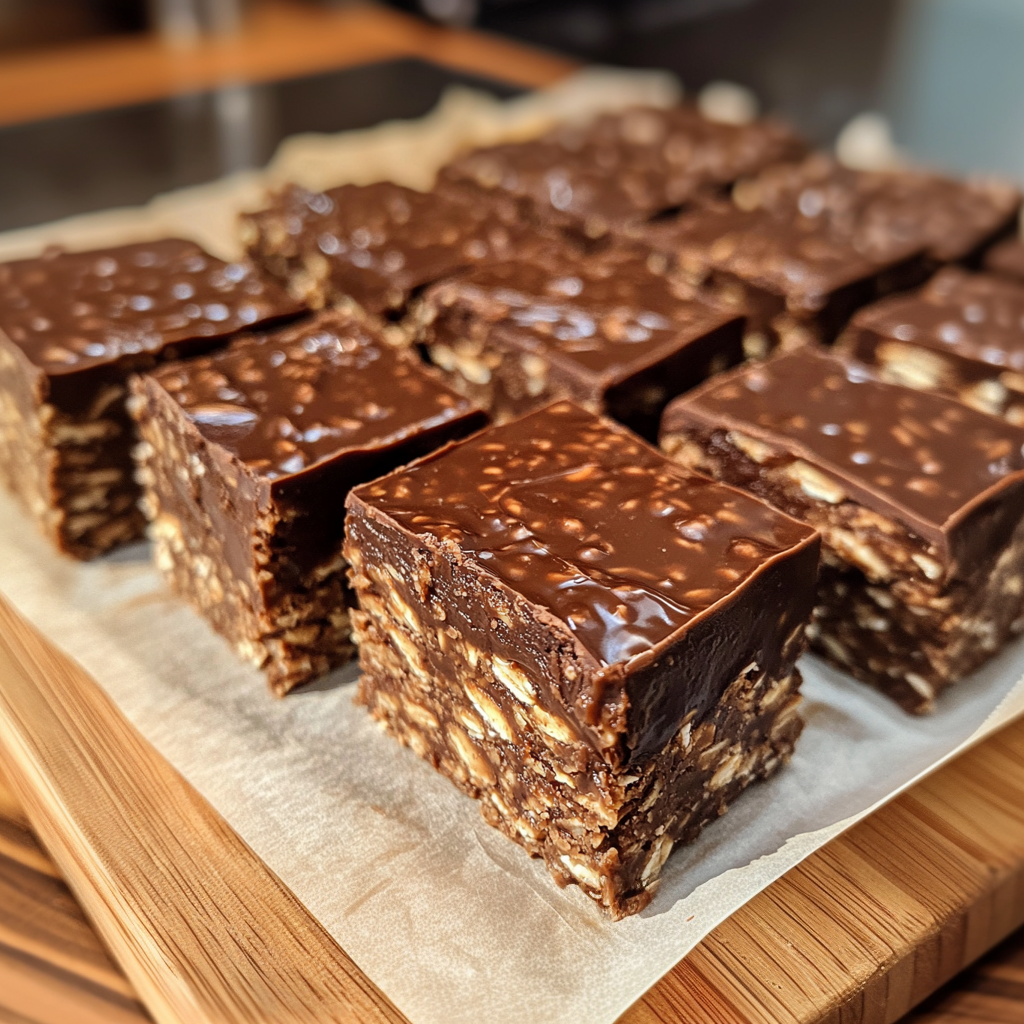
Introduction
I’ll be honest—I discovered these healthy no-bake chocolate peanut butter oatmeal bars during a midnight craving crisis. My sweet tooth was screaming, but I refused to drive to the store or wait for cookies to bake. What happened next surprised me completely. Let me show you how five simple ingredients became my new obsession.
Why You’ll Love This Recipe
Trust me, these bars check every single box you didn’t even know you had:
- Ready in 15 minutes (plus chill time—but that’s hands-off)
- No oven required, so your kitchen stays cool
- Naturally sweet without refined sugar overload
- Protein-packed thanks to peanut butter and oats
- Kid-approved yet sophisticated enough for adults
- Meal prep friendly—they actually get better after a day
- Customizable—add whatever you’re craving
You’ll see what I mean when that first bite hits. The texture is absolutely perfect—chewy, fudgy, and satisfying without being overly dense.
Ingredients Needed
Here’s everything you need for these healthy no-bake chocolate peanut butter oatmeal bars:
- 1½ cups rolled oats
- ½ cup peanut butter
- ¼ cup honey or maple syrup
- ¼ cup cocoa powder
- 1 teaspoon vanilla extract
- Pinch of salt
- ¼ cup dark chocolate chips (optional but recommended)
Ingredient Notes
Let’s talk specifics because the details matter here. For oats, stick with old-fashioned rolled oats—not instant or steel-cut. They provide the perfect chewy texture we’re after. I’ve tried both natural peanut butter and regular, and honestly, both work beautifully. However, if you’re using natural peanut butter, make sure it’s well-stirred first.
The honey versus maple syrup debate? Either works, but maple syrup creates a slightly more complex flavor that I absolutely love. For cocoa powder, go with unsweetened—we’re controlling the sweetness ourselves here.
How to Make It
Step 1: Prepare Your Pan
Line an 8×8 inch pan with parchment paper, leaving some overhang for easy removal later. This step saves you so much frustration—trust me on this one.
Step 2: Melt the Base
In a saucepan over low heat, gently melt together your peanut butter and honey. Stir constantly to prevent sticking. The mixture should be smooth and warm, not hot.
Step 3: Add the Flavor Boosters
Remove from heat immediately and whisk in vanilla extract, cocoa powder, and that pinch of salt. Don’t skip the salt—it’s the secret ingredient that makes everything pop.
Step 4: Fold in the Oats
Add your oats and mix until every single piece is coated with that gorgeous chocolate-peanut butter mixture. The consistency should look like thick, chocolatey oatmeal.
Step 5: Press and Chill
Transfer the mixture to your prepared pan and press down firmly with a spatula or your hands. Sprinkle chocolate chips on top if using, then refrigerate for at least 2 hours before slicing.

Nutritional Information
Each bar (assuming 16 servings) contains approximately:
- Calories: 145
- Protein: 5g
- Carbohydrates: 18g
- Fat: 7g
- Fiber: 3g
- Natural sugars: 6g
These numbers make me feel good about reaching for seconds—and trust me, you will want seconds.
Key Ingredients Breakdown + Health Benefits
Rolled Oats are the real MVP here. They’re loaded with beta-glucan fiber, which helps stabilize blood sugar and keeps you satisfied longer. I used to think oats were boring until I discovered how creamy and substantial they become in no-bake recipes.
Peanut Butter brings healthy fats, protein, and that irresistible nutty richness. It’s also packed with niacin and vitamin E. I’ve noticed these bars actually keep me full between meals, unlike regular cookies that leave me craving more sugar.
Honey or Maple Syrup provides natural sweetness plus trace minerals. Unlike refined sugar, these natural sweeteners won’t cause the same energy crash. I’ve experimented with both, and each brings its own personality to the bars.
Cocoa Powder delivers antioxidants called flavonoids, plus that deep chocolate flavor we’re craving. It’s amazing how just ¼ cup transforms the entire recipe into something that feels indulgent but is actually nourishing.
Vanilla Extract might seem like a small addition, but it rounds out all the other flavors and adds warmth. Real vanilla extract makes a noticeable difference—I promise it’s worth the extra cost.
Why This Recipe Works
The magic happens in the balance, and I wasn’t sure this would work when I first tried it. The peanut butter acts as both a binder and flavor base, while the honey provides just enough moisture to hold everything together without making it sticky. The cocoa powder absorbs some of that moisture, creating the perfect fudgy texture.
What really surprised me was how the oats transform. Instead of staying separate and chewy, they soften slightly and become part of this cohesive, almost brownie-like texture. The salt enhances both the chocolate and peanut butter flavors, making each bite more complex than you’d expect from such simple ingredients.
The chilling process is crucial—it allows all the flavors to meld while the mixture firms up to that perfect sliceable consistency.
Is This Recipe Right for You?
These healthy no-bake chocolate peanut butter oatmeal bars are perfect if you’re a busy parent needing quick snacks, someone who loves dessert but wants to feel good about it, or anyone who gets sudden sweet cravings but doesn’t want to turn on the oven.
They’re also ideal for meal preppers, chocolate-peanut butter lovers, and people who want something satisfying that won’t leave them in a sugar crash. If you’re looking for naturally sweet treats that kids and adults both devour, this is your recipe.
Who Should Avoid It?
Be cautious if you have peanut allergies (obviously), or if you’re avoiding oats due to gluten sensitivity. While oats are naturally gluten-free, cross-contamination can be an issue for some people. Those watching their fat intake should note that these are calorie-dense due to the peanut butter.
Customization Ideas
Feeling fancy? Here are some variations I’ve tried and loved:
- Tropical twist: Add shredded coconut and dried pineapple pieces
- Protein boost: Mix in a scoop of vanilla protein powder
- Nut-free version: Substitute sunflower seed butter
- Spice it up: Add a pinch of cinnamon or cayenne pepper
- Fruity addition: Fold in dried cranberries or chopped dates
- Extra decadent: Drizzle melted dark chocolate on top
- Crunch factor: Add chopped almonds or pumpkin seeds
Each variation brings something new to the table, so don’t be afraid to experiment.
Kitchen Tools You’ll Need
You probably have everything already: a medium saucepan, wooden spoon or whisk, measuring cups and spoons, and an 8×8 inch pan. Parchment paper is essential—don’t try to skip it unless you enjoy scraping stuck bars from your pan.
A flexible spatula helps with pressing the mixture evenly, and a sharp knife makes clean cuts once they’re chilled. If your peanut butter tends to separate, keep a fork handy for stirring it smooth before measuring.
Pro Tips & Common Mistakes
Here’s what I’ve learned from making these countless times:
Don’t overheat the peanut butter mixture—it should be warm, not hot, or it might make the oats mushy. Press firmly into the pan for bars that hold together perfectly. I made the mistake of being gentle the first time, and they crumbled when I tried to cut them.
Chill fully before slicing—I know it’s tempting to cut into them early, but patience pays off here. Use a sharp knife and wipe it clean between cuts for the prettiest bars. If they seem too soft after chilling, pop them in the freezer for 15 minutes.
Serving Suggestions
These bars are incredibly versatile. I love them as an afternoon snack with coffee, crumbled over Greek yogurt for breakfast, or packed in lunch boxes for a midday energy boost. They’re perfect for post-workout fuel when you need protein and carbs together.
Try warming one slightly and serving with a glass of cold milk for the ultimate comfort combo. They’re also fantastic for picnics, potlucks, or any time you need a crowd-pleasing dessert that travels well. The rich, satisfying flavor makes them feel special enough for entertaining.
Reader Success Stories
Sarah from Denver messaged me: “Made these for my kids’ soccer team snacks and the parents kept asking for the recipe! Even my picky 8-year-old demolished two bars.”
Mike, a college student, said: “Bro, these saved my late-night study sessions. Way better than vending machine junk and they actually keep me full.”
Jennifer, working mom of three: “I make a double batch every Sunday for the week. They’re gone by Wednesday—might need to start tripling it! My husband sneaks them for breakfast thinking I don’t notice.”
These stories make my heart happy because that’s exactly what I hoped would happen when I started sharing this recipe.
Storing & Freezing Guide
Store these healthy no-bake chocolate peanut butter oatmeal bars in an airtight container in the refrigerator for up to one week. They actually taste better after the first day when all the flavors have time to meld together.
For longer storage, wrap individual bars in plastic wrap and freeze for up to three months. They thaw beautifully at room temperature in about 15 minutes, or you can eat them straight from the freezer for a firmer, almost ice-cream-bar texture.
Use glass containers or sturdy plastic containers—avoid thin plastic bags that might get crushed and break your perfectly shaped bars.
FAQs
Can I use almond butter instead of peanut butter? Absolutely! Almond butter works perfectly and creates a slightly nuttier flavor. Any nut or seed butter works—just make sure it’s well-stirred and not too thick.
Will this work with instant oats? I don’t recommend it. Instant oats break down too much and create a mushy texture instead of the chewy bite we want. Stick with old-fashioned rolled oats for best results.
Can I double the recipe? Yes! Use a 9×13 inch pan instead and press the mixture evenly. The chilling time might need an extra 30 minutes, but otherwise everything else stays the same.
Are these safe for toddlers? They’re perfect for toddlers over 12 months (due to the honey). The texture is soft enough for little teeth, and there are no choking hazards. My friend’s 18-month-old calls them “chocolate cookies.”
How do I keep them from falling apart when I cut them? Make sure they’re fully chilled, use a sharp knife, and press down firmly when you’re packing the mixture into the pan. If they’re still crumbly, they might need more moisture—try adding an extra tablespoon of honey next time.
Final Thoughts
These healthy no-bake chocolate peanut butter oatmeal bars have become my go-to recipe when I want something sweet but substantial. They prove that you don’t need complicated ingredients or techniques to create something absolutely delicious.
What I love most is how they make everyone happy—the health-conscious appreciate the wholesome ingredients, while the dessert lovers are just blown away by the rich, fudgy taste. It’s a win-win that happens rarely in the kitchen.
Try these bars and let me know what you think! Tag me if you make them—I love seeing your creative variations and hearing about whose lives they’ve made a little sweeter.

