
Introduction
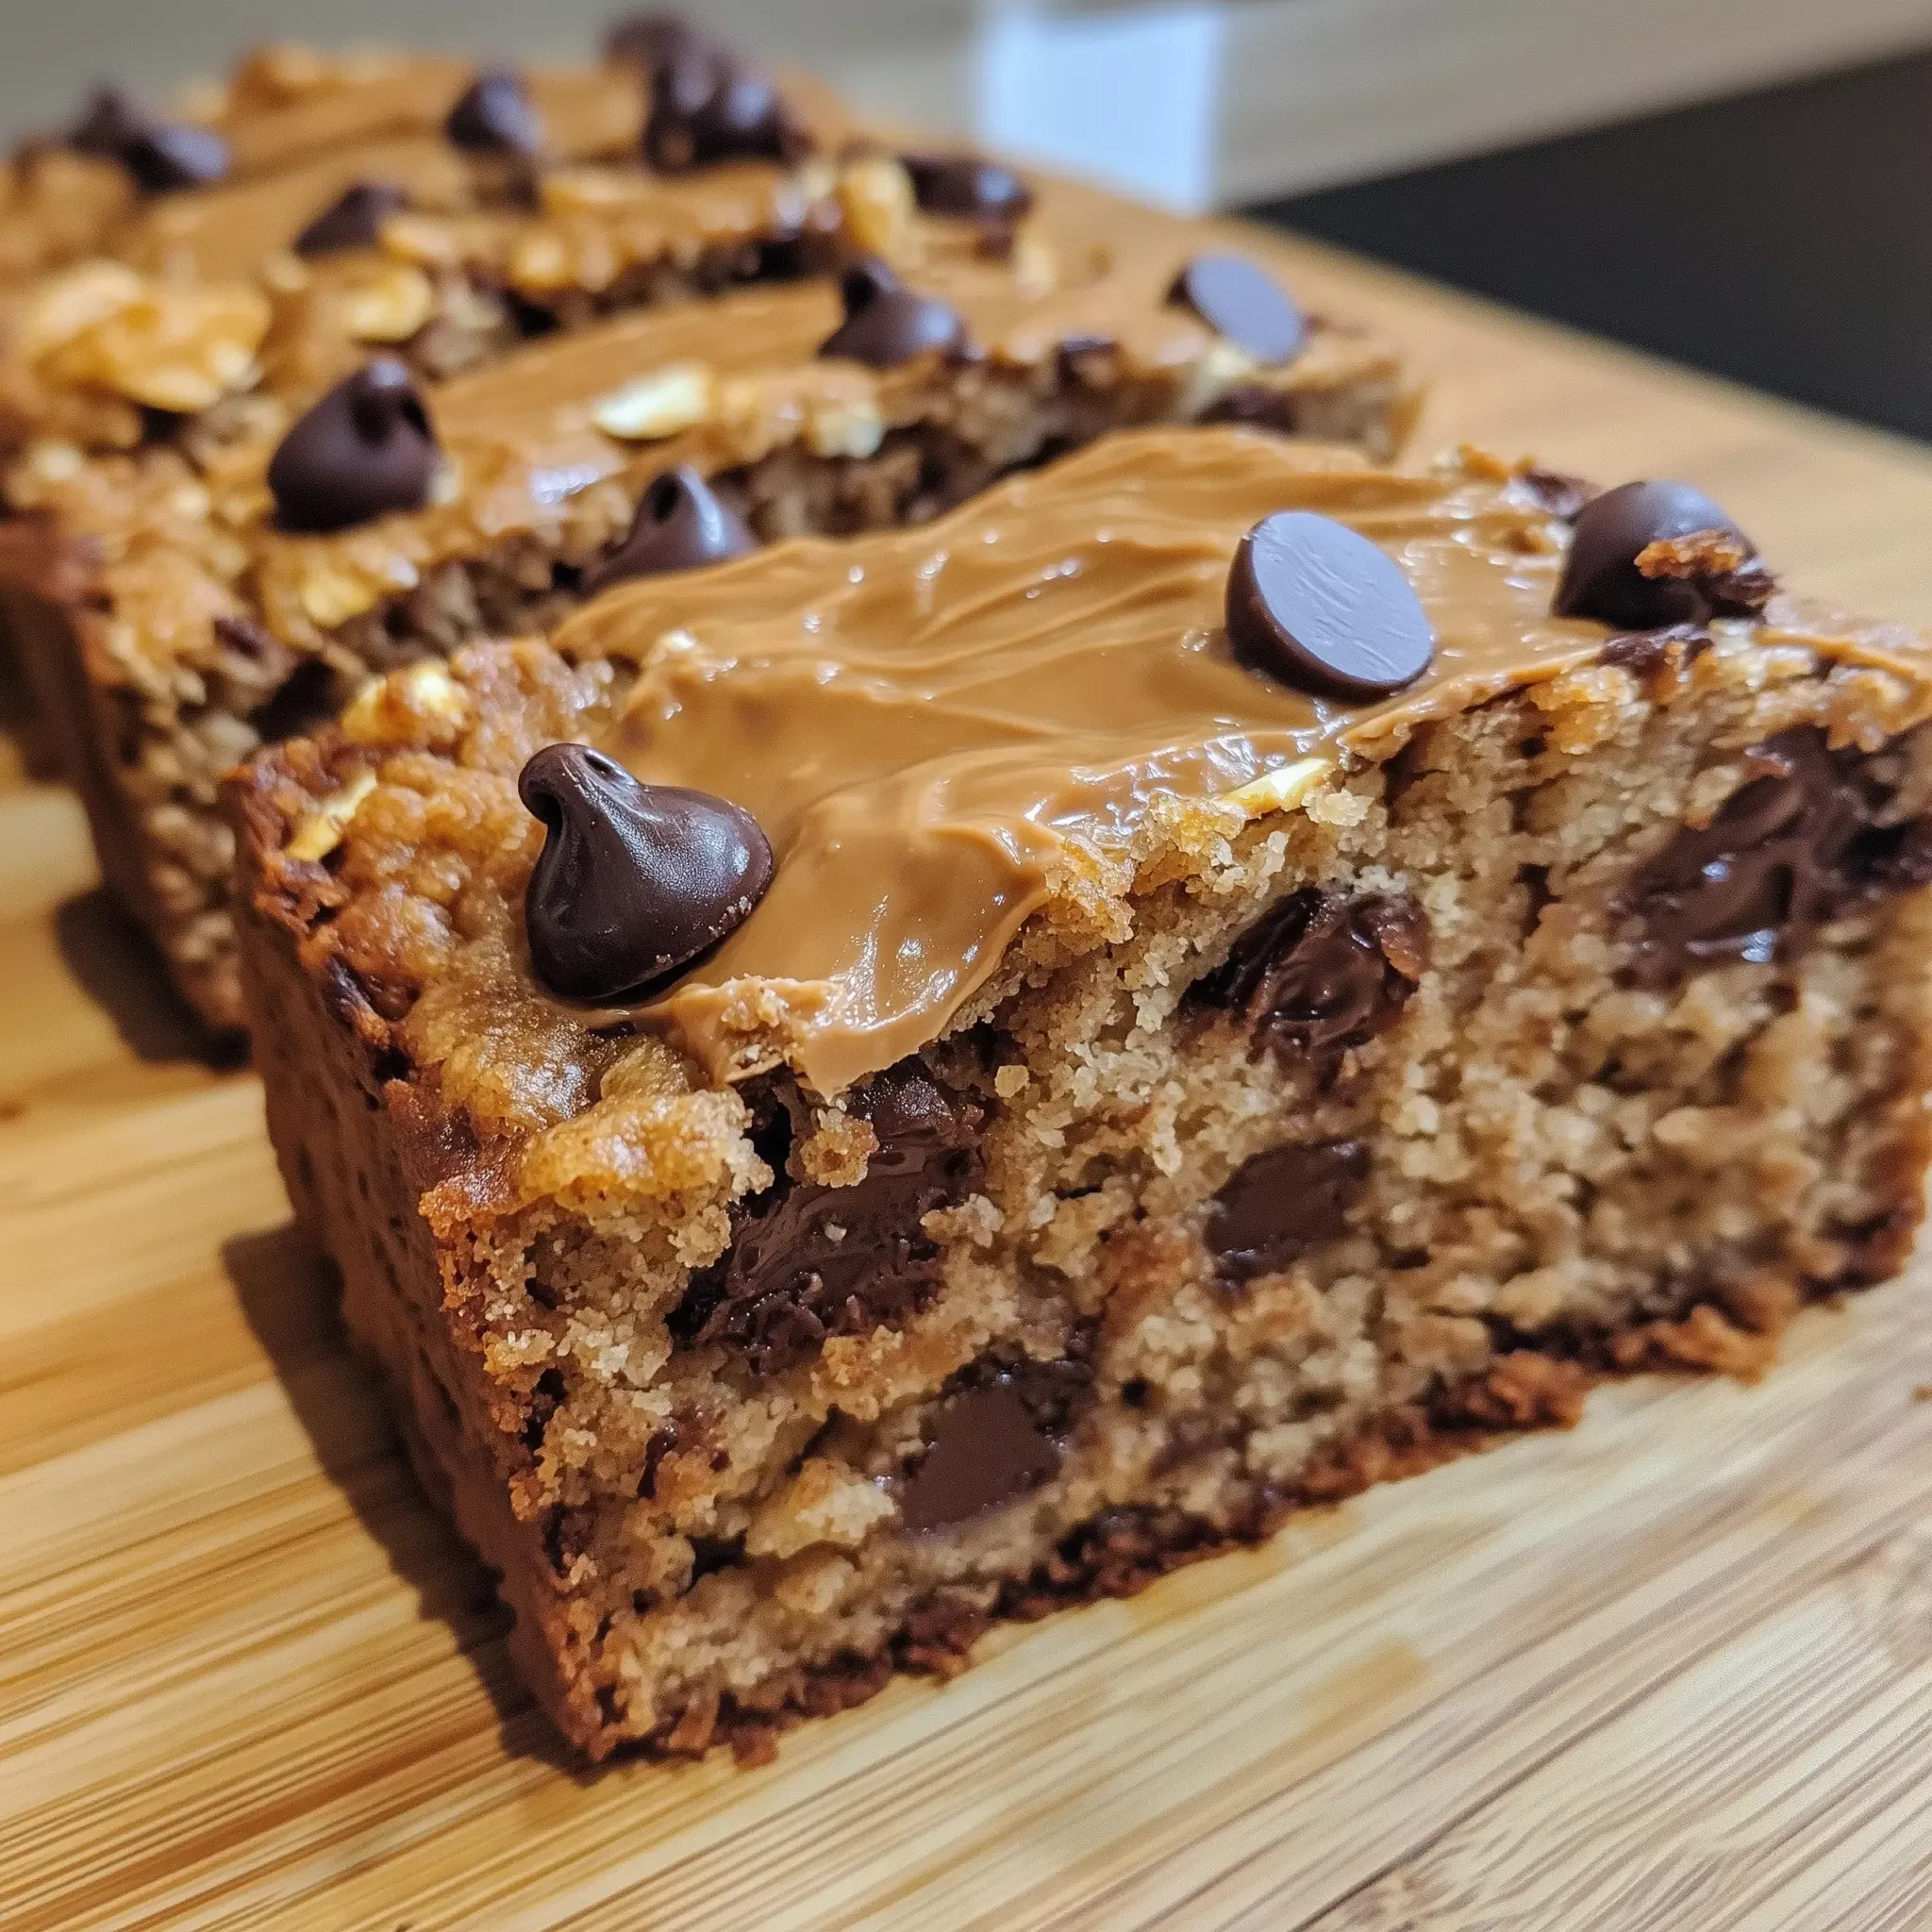
There’s something magical about bars that have soft centers — they feel indulgent while being way better for you than they have any right to be. These Greek yogurt peanut butter banana chocolate chip oat bars are exactly what I reach for when I want something chewy and satisfying without the guilt. The combination of creamy peanut butter topping with melted chocolate chips scattered throughout creates layers of texture that make every bite interesting. What surprised me most is how these bars stayed soft for a full week, actually improving as flavors melded together.
Why You’ll Love This Recipe
Soft centers that stay perfect for days — Banana and Greek yogurt keep these impossibly tender and chewy throughout the entire week.
Peanut butter-chocolate combo is legendary — That creamy peanut butter topping with chocolate chips pressed in creates texture that’s impossible to resist.
High-protein snack bar — Get 13+ grams of protein per bar from Greek yogurt, eggs, and peanut butter working together seamlessly.
Chewy oat texture with chocolate pockets — Mini chocolate chips throughout plus the topping create surprise moments of richness in every bite.
Make-ahead breakfast or snack ready — Bake once on Sunday and have a grab-and-go nutritious option all week long.
Ingredients Needed
For the Oat Bars:
- 2 ripe bananas, mashed
- ½ cup Greek yogurt
- ⅓ cup creamy peanut butter
- ¼ cup honey or maple syrup
- 2 eggs
- 1 teaspoon vanilla extract
- 1¼ cups oat flour
- ½ cup rolled oats
- 1 teaspoon baking powder
- ½ teaspoon cinnamon
- ¼ teaspoon salt
- ⅓ cup mini chocolate chips
For the Peanut Butter-Chocolate Topping:
- 2 tablespoons creamy peanut butter
- 2 tablespoons mini chocolate chips
Ingredient Notes
Those ripe bananas with brown spots are essential — they bring moisture and natural sweetness that keeps these bars soft and chewy rather than dense. I always reach for full-fat Greek yogurt because it’s thicker and creamier, creating that luxurious texture nobody expects from a healthy snack bar. Creamy peanut butter (not natural or chunky) blends smoothly and distributes evenly. The combination of oat flour and rolled oats is crucial: oat flour creates tenderness while rolled oats add that satisfying chewiness. Fresh cinnamon matters because it complements chocolate and peanut butter beautifully. Quality mini chocolate chips distribute throughout without overwhelming, creating surprise pockets rather than chocolate-heavy bars.
How to Make It
Step 1: Prep Your Pan and Heat Your Oven
Heat your oven to 350°F and line an 8×8-inch square baking pan with parchment paper. Let the parchment hang over edges for effortless removal. This simple prep prevents sticking and tearing of these delicate, soft-centered bars. Thirty seconds of setup saves serious frustration later.
Step 2: Combine Bananas with All Wet Ingredients Smoothly
In a large bowl, whisk mashed bananas, Greek yogurt, peanut butter, honey, eggs, and vanilla extract until completely smooth. This takes about two minutes of whisking. The mixture should be thick but pourable with no visible streaks. You’re creating that creamy base that becomes chewy as these bars bake.
Step 3: Mix Dry Ingredients Together Separately
Whisk together oat flour, rolled oats, baking powder, cinnamon, and salt in another bowl. This separate mixing distributes the baking powder evenly, which means consistent rise and texture. Separate mixing creates noticeably better results than combining everything together directly.
Step 4: Fold Wet and Dry Together Until Just Combined
Pour dry ingredients into wet mixture and fold gently with a spatula until you don’t see dry flour streaks. Stop immediately because overmixing makes these tough instead of chewy. Less mixing actually creates that tender, soft texture you’re after, so embrace the imperfect fold.
Step 5: Fold in Mini Chocolate Chips Carefully
Fold in those mini chocolate chips gently so they distribute throughout. These create surprise pockets throughout the bars without overwhelming the delicate oat texture. Gentle folding preserves the soft crumb you’re building.
Step 6: Spread Batter and Bake Until Golden Edges, Soft Center
Pour batter into prepared pan and smooth the top gently. Bake for 23–27 minutes until edges are golden but the center still jiggles slightly. The center continues cooking as it cools, so underbaking is better than overbaking here for maximum softness.
Step 7: Cool, Then Add Peanut Butter Topping with Chocolate Chips
Once completely cooled, spread that creamy peanut butter across the top. Then sprinkle mini chocolate chips and press them gently into the peanut butter. The peanut butter holds them in place while creating a luxurious topping layer.
Key Ingredients & Health Benefits
Ripe Bananas bring natural sweetness, potassium, and moisture that creates those signature soft centers. They’re packed with resistant starch that feeds beneficial gut bacteria and supports digestive health. Two bananas means genuine fruit nutrition throughout your bars.
Greek Yogurt delivers around 10 grams of protein per bar plus incredible creaminess without heaviness. The tang brightens chocolate and peanut butter flavor naturally, so you need less added sugar overall. It’s genuinely transformative in baking bars.
Peanut Butter adds healthy monounsaturated fats plus around 3 grams of protein per bar. It creates richness that makes these bars feel indulgent while being nutritious. That creamy topping is what elevates everything from simple to special.
Oat Flour and Rolled Oats work together creating texture and structure while delivering fiber and whole-grain nutrition. Oat flour creates tenderness, rolled oats add that satisfying chewiness. Together they’re what make these bars memorable.
Customization Ideas
Add chopped walnuts or pecans to the batter for textural contrast and nutty richness throughout. Fold in dark chocolate chips instead of (or alongside) mini chips for deeper chocolate presence. Swirl almond butter into the peanut butter topping for a different nut flavor while keeping that creamy texture. Mix vanilla chai spices (cardamom, clove) into the batter for warm, sophisticated depth. Drizzle melted dark chocolate across the peanut butter topping for extra indulgence.
Pro Tips & Common Mistakes
Pro Tip #1: Let your eggs and Greek yogurt sit at room temperature for 15 minutes. Warm ingredients blend more smoothly and create better texture than cold ingredients pulled straight from the fridge.
Pro Tip #2: Don’t skip the cooling step before adding the topping. Warm bars will cause the peanut butter topping to melt and slide. Complete cooling lets you spread the peanut butter smoothly and press chocolate chips firmly.
Pro Tip #3: Use parchment paper and let these cool slightly before slicing. Warm bars are soft and can crumble; cooling for 15 minutes lets them set just enough for clean slices while staying chewy inside.
Common Mistake: Overmixing the batter. These need to stay slightly undermixed to maintain that chewy, tender texture. Stop mixing as soon as you don’t see dry flour — slight lumpiness actually helps create better bars.
Storing & Freezing Guide
These bars keep in an airtight container at room temperature for 3–4 days, or in the fridge for up to a full week. The soft centers stay perfect throughout. For freezing, wrap individual bars in plastic wrap and store in a freezer bag for up to 3 months. Thaw at room temperature for 30 minutes. I usually bake these on Sunday and grab one every morning for an easy, protein-packed breakfast throughout the week.
FAQs
Why are my bars cakey instead of chewy?
You likely overbaked them or overmixed the batter. Check at 23 minutes — underbaking is better than overbaking here. Also, make sure you’re using full-fat Greek yogurt and quality oat flour, as these directly affect texture.
Can I make these without the peanut butter topping?
Absolutely. The bars are delicious on their own, and a simple drizzle of melted chocolate works beautifully. The peanut butter topping just adds that extra indulgence and holds the chocolate chips in place.
What if I only have all-purpose flour?
You can substitute ¾ cup all-purpose flour for the oat flour. The texture will be slightly different but still soft and chewy. Oat flour just creates that tender, interesting crumb these bars are known for.
Can I freeze these before adding the topping?
Yes, freeze the baked bars first, then add the topping after thawing. Alternatively, you can prepare them with toppings and freeze — either way works perfectly fine.
Final Thoughts
These healthy Greek yogurt peanut butter banana chocolate chip oat bars with soft centers have become my go-to when I want something genuinely indulgent that’s also packed with nutrition. Every bite combines creamy, chewy, and chocolatey textures in a way that feels special. I’d absolutely love to hear if you make these — drop a comment below or tag me on social media with your bar creation. Did you customize the topping or add your own twist? I’m always excited to see how people make recipes their own.