
Introduction
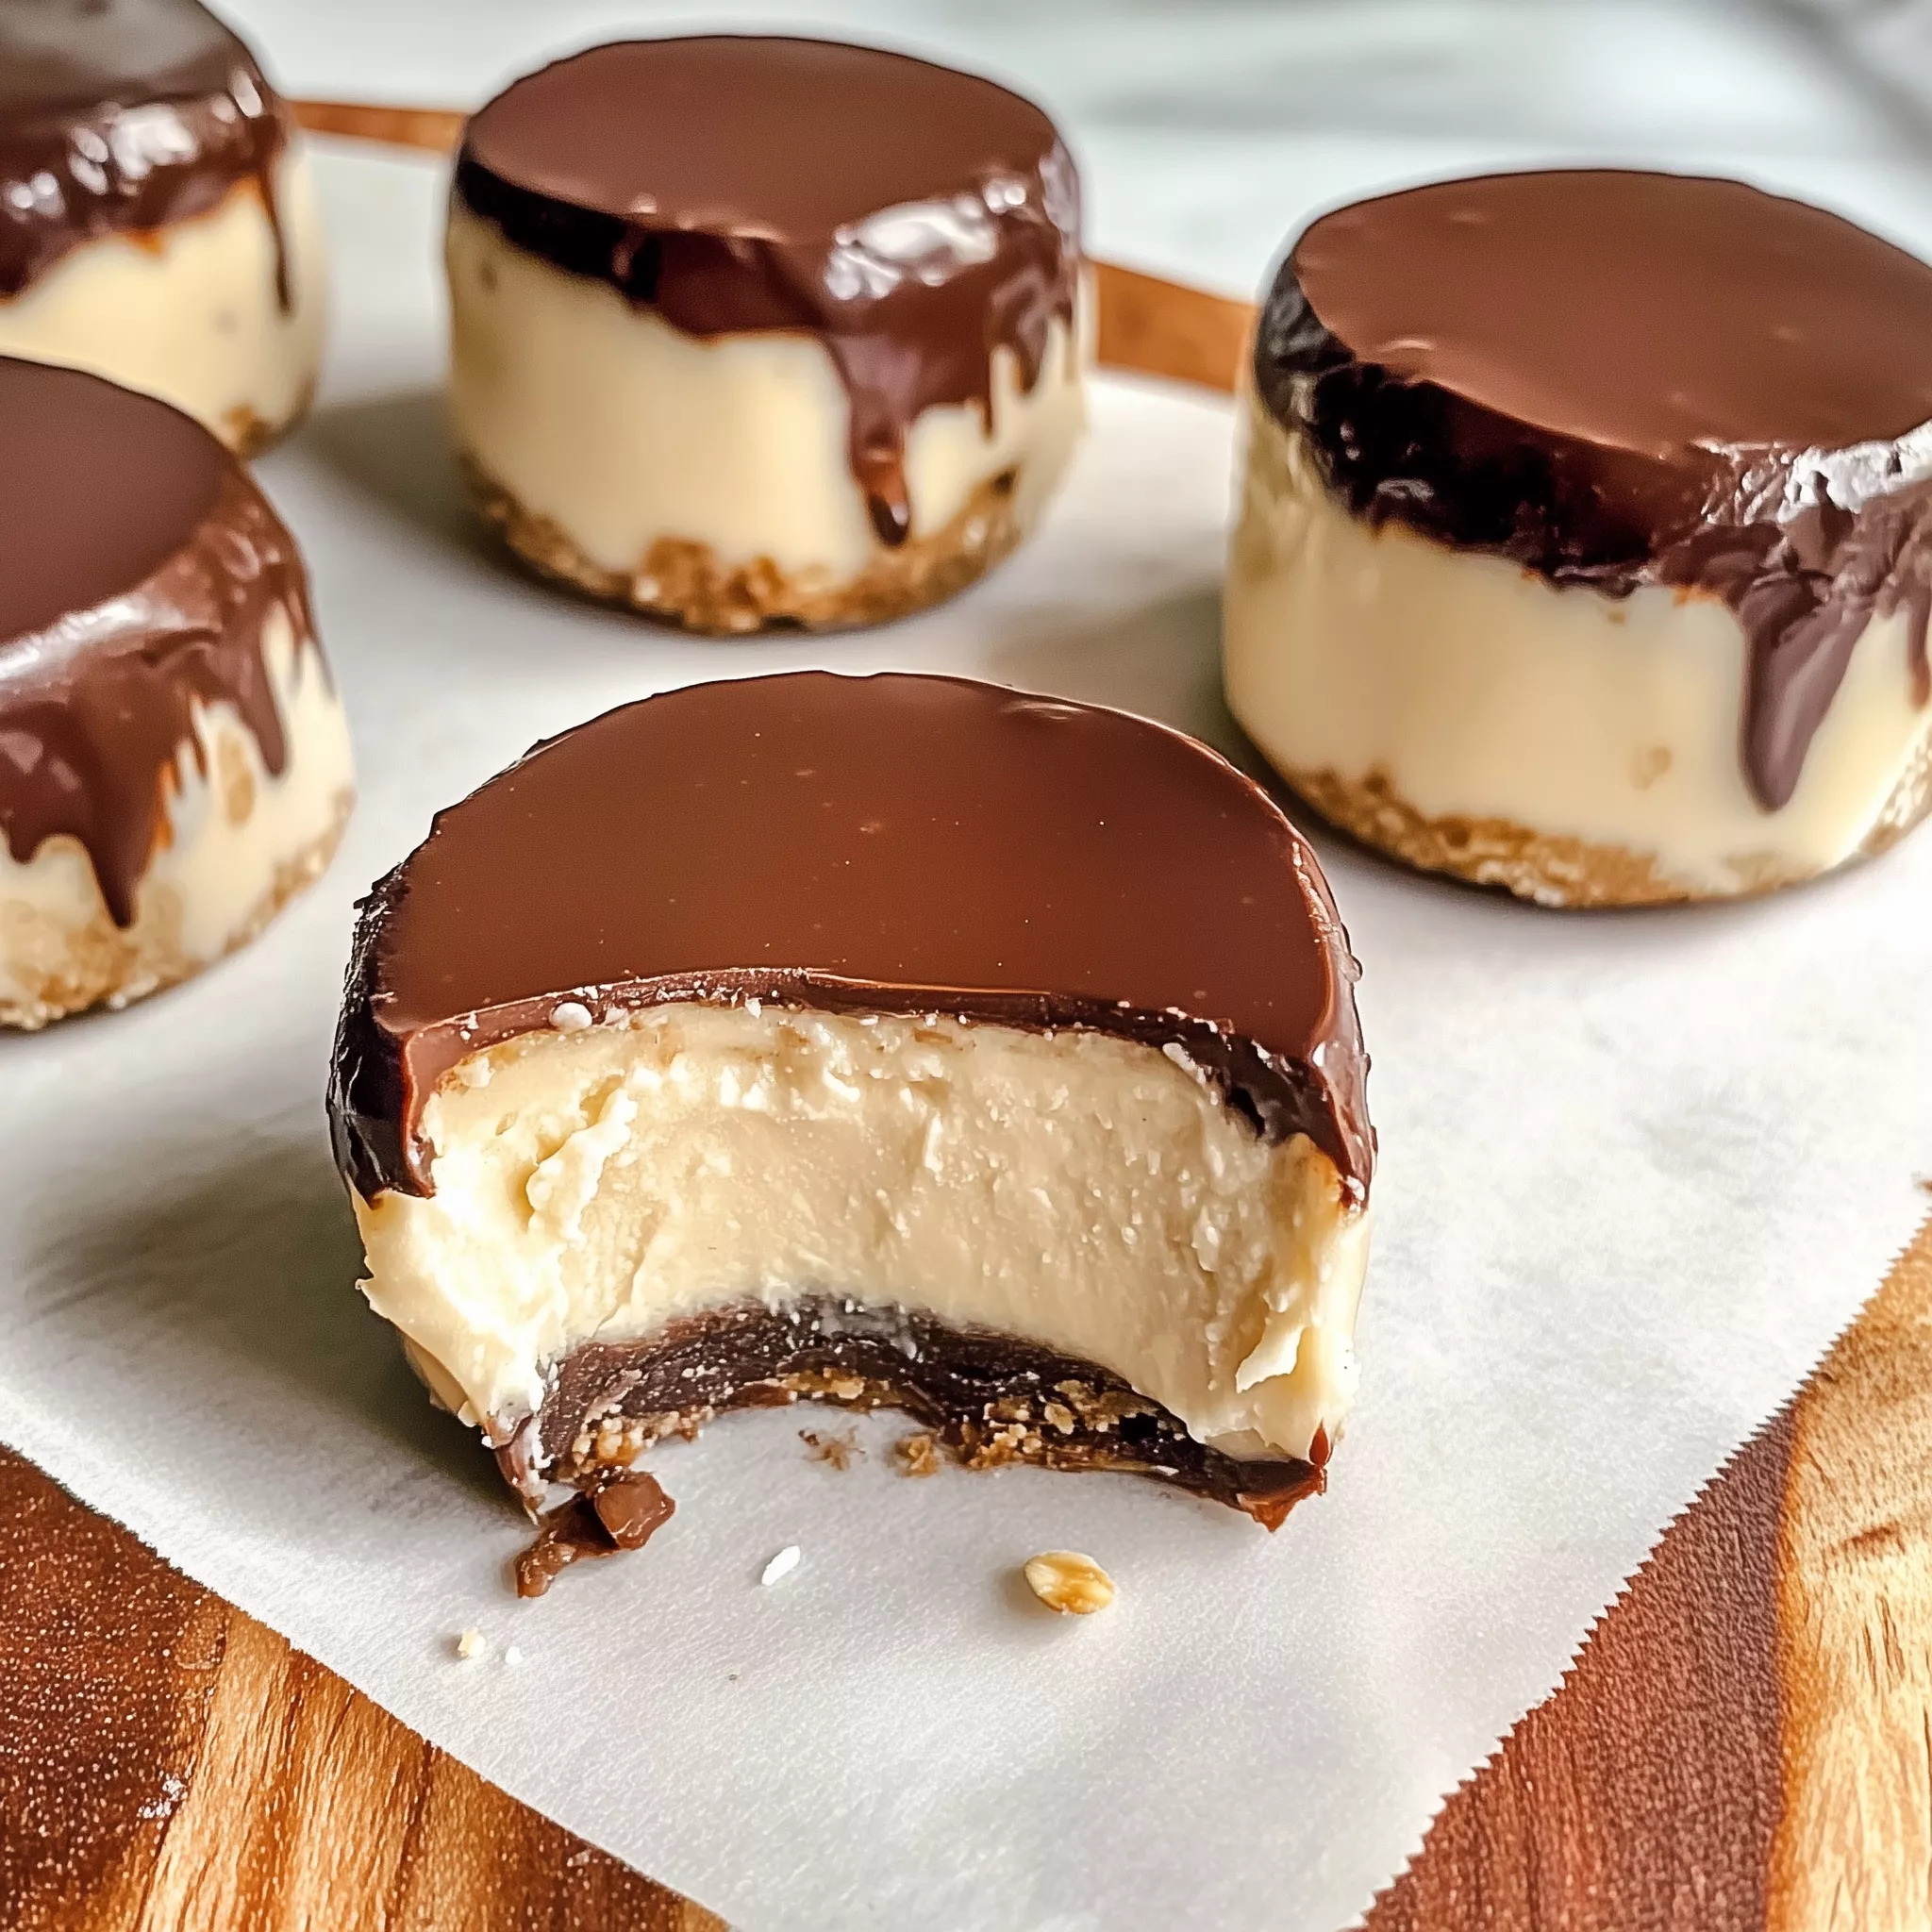
I discovered these no-bake cups completely by accident when I wanted something that looked fancy but required zero oven time. These Greek yogurt peanut butter banana chocolate fudge cups are basically homemade truffles that happen to be packed with protein and whole grains. The creamy peanut butter filling sandwiched between an oat base and melted dark chocolate creates something that tastes genuinely indulgent. What surprised me most is how these taste like something from a specialty chocolate shop, except you made them in your kitchen in under 20 minutes with ingredients you actually recognize.
Why You’ll Love This Recipe
No oven required — These are completely no-bake, perfect for hot days or when your kitchen’s already full.
Looks fancy, tastes incredible — Individual chocolate cups with creamy centers look like you spent hours when they took 15 minutes.
High-protein indulgence — Get 10+ grams of protein per cup from Greek yogurt and peanut butter combined.
Naturally sweet and satisfying — Banana and honey create sweetness without refined sugar; these keep you full for hours.
Make-ahead freezer-friendly — Prep a batch and grab one whenever you want something decadent that’s actually good for you.
Ingredients Needed
For the Peanut Butter Filling:
- ¾ cup Greek yogurt
- ½ cup creamy peanut butter
- 1 ripe banana, mashed
- ¼ cup honey or maple syrup
- 1 teaspoon vanilla extract
- 1 cup oat flour
- ½ cup rolled oats
- ¼ teaspoon cinnamon
- ¼ teaspoon salt
- ¼ cup mini chocolate chips
For the Chocolate Cups:
- ½ cup dark chocolate chips
- 1 tablespoon creamy peanut butter
- 2 tablespoons crushed oats (for the base)
Ingredient Notes
I always use full-fat Greek yogurt because it’s thicker and creamier, creating that luxurious truffle texture. Creamy peanut butter (not natural or chunky) blends smoothly into the filling. That ripe banana should have brown spots; it brings moisture and sweetness that keeps these cups soft and creamy. For the oat situation, oat flour creates smoothness while rolled oats add texture and substance. Quality dark chocolate chips matter for the coating — cheaper brands taste waxy rather than silky. Those crushed oats in the base add crunch and help the chocolate coating stick. Fresh cinnamon complements chocolate and peanut butter beautifully without being heavy.
How to Make It
Step 1: Prepare Your Muffin Liners and Base Layer
Line a standard muffin tin with paper liners (12 cups total). In a small bowl, mix those crushed oats with a tiny drizzle of honey. Press about ½ teaspoon of this mixture into the bottom of each liner. This creates a base that helps the chocolate coating stick and adds textural interest. The crushed oat base is what makes these feel like proper chocolates rather than just filled cups.
Step 2: Combine Greek Yogurt with Peanut Butter Base
In a medium bowl, whisk Greek yogurt, peanut butter, mashed banana, honey, and vanilla extract until completely smooth. This takes about two minutes of whisking. The mixture should be thick and creamy with no visible streaks. You’re creating that luxurious filling that makes these cups genuinely special and indulgent-tasting.
Step 3: Mix Oat Flour and Rolled Oats into Filling
Add oat flour, rolled oats, cinnamon, and salt to your yogurt mixture. Fold everything together gently until well combined and thick. The mixture should hold its shape when you press it but still feel creamy. This oat base creates structure that holds the filling while staying tender rather than hard.
Step 4: Fold in Mini Chocolate Chips for Texture
Fold in those mini chocolate chips gently so they distribute throughout the filling. These create surprise pockets throughout your cups without overwhelming the delicate texture. Less mixing preserves that creamy texture you’re building here.
Step 5: Fill Each Cup with Creamy Peanut Mixture
Divide the filling evenly among your prepared cups, pressing it gently into each liner. Each cup should be about half-full so there’s room for the chocolate coating. Even filling means consistent bites throughout, so take a moment to level them out slightly.
Step 6: Melt Chocolate and Peanut Butter, Then Coat Cups
Melt dark chocolate chips with that tablespoon of peanut butter (30 seconds in the microwave, stirring between bursts). The filling should be cool by now. Spoon chocolate coating over each cup, coating the top and sides evenly. Return to the freezer for 15 minutes until chocolate sets completely and hardens.
Key Ingredients & Health Benefits
Greek Yogurt delivers around 7 grams of protein per cup plus incredible creaminess that creates that truffle-like texture. The tang brightens chocolate flavor naturally, so you need less added sugar. It’s genuinely transformative in creating indulgent texture from healthy ingredients.
Peanut Butter adds healthy monounsaturated fats plus around 3 grams of protein per cup. It creates that beloved peanut butter-chocolate combination that’s beloved for generations. Those creamy pockets are what make these taste genuinely special and decadent.
Ripe Banana brings natural sweetness, potassium, and moisture that keeps the filling impossibly creamy. It pairs beautifully with peanut butter and chocolate, creating a sophisticated flavor combination that tastes gourmet.
Oat Flour and Rolled Oats work together creating structure and texture while delivering fiber and whole-grain nutrition. They keep the filling stable while maintaining that creamy mouthfeel that makes these cups so satisfying.
Customization Ideas
Add chopped dark chocolate directly into the filling for deeper chocolate presence throughout. Fold in crushed pretzels for sweet-salty crunch that contrasts beautifully with the creamy filling. Swirl almond butter into the peanut butter filling for a different nut flavor combination. Mix espresso powder into the chocolate coating for mocha-flavored cups that taste mysterious. Top with a tiny sprinkle of sea salt before the chocolate hardens for sweet-salty complexity.
Pro Tips & Common Mistakes
Pro Tip #1: Make sure your filling is completely cool before adding the chocolate coating, or it’ll melt and separate. Chill the filled cups for at least 30 minutes before coating for best results.
Pro Tip #2: Use a spoon to coat the tops rather than dipping, which can cause the filling to squeeze out. A gentle spoon-applied coating gives you control and even coverage every time.
Pro Tip #3: Freeze these for at least 15 minutes after coating so the chocolate sets completely. They’ll stay creamy inside but have that satisfying chocolate snap when you bite through.
Common Mistake: Overmixing the filling. These need to stay creamy and slightly lumpy to maintain that truffle-like texture. Stop mixing as soon as everything is incorporated — slight imperfection is your goal.
Storing & Freezing Guide
These cups keep in an airtight container in the freezer for up to 3 months. They’re best enjoyed straight from the freezer when the chocolate is snappy and the filling is creamy. Thaw one at room temperature for 10–15 minutes if you prefer a softer filling, or keep them frozen for that satisfying chocolate snap. I usually prep a batch and grab one whenever I want something indulgent that’s actually packed with nutrition.
FAQs
Can I make these without the crushed oat base?
Absolutely. The chocolate coating will still stick without it; the oat base just adds textural interest and helps the coating adhere better. Feel free to skip it if you prefer simpler cups.
What if my chocolate coating is too thick?
Melt it with an extra ½ tablespoon of coconut oil or butter to thin it out. You want it pourable enough to coat easily but thick enough to harden. Practice makes perfect here.
Can I use regular peanut butter instead of creamy?
Chunky peanut butter creates a different texture but still works. Just make sure to blend it smoothly into the filling so the chunks distribute evenly throughout the cup.
How long do these last in the fridge?
They keep in the fridge for up to 5 days, though they’re best frozen. If refrigerated, the filling softens slightly, which some people prefer. Either way, they’re delicious and satisfy cravings completely.
Final Thoughts
These no-bake Greek yogurt peanut butter banana chocolate fudge cups prove that homemade treats can be genuinely indulgent while packed with real nutrition. They taste like something from a specialty chocolate shop while being made in your kitchen with ingredients you recognize. I’d love to hear if you make these — drop a comment below or tag me on social media with your cup creation. Did you customize the filling or chocolate coating? I’m always inspired by how people make recipes their own.